Opening Description
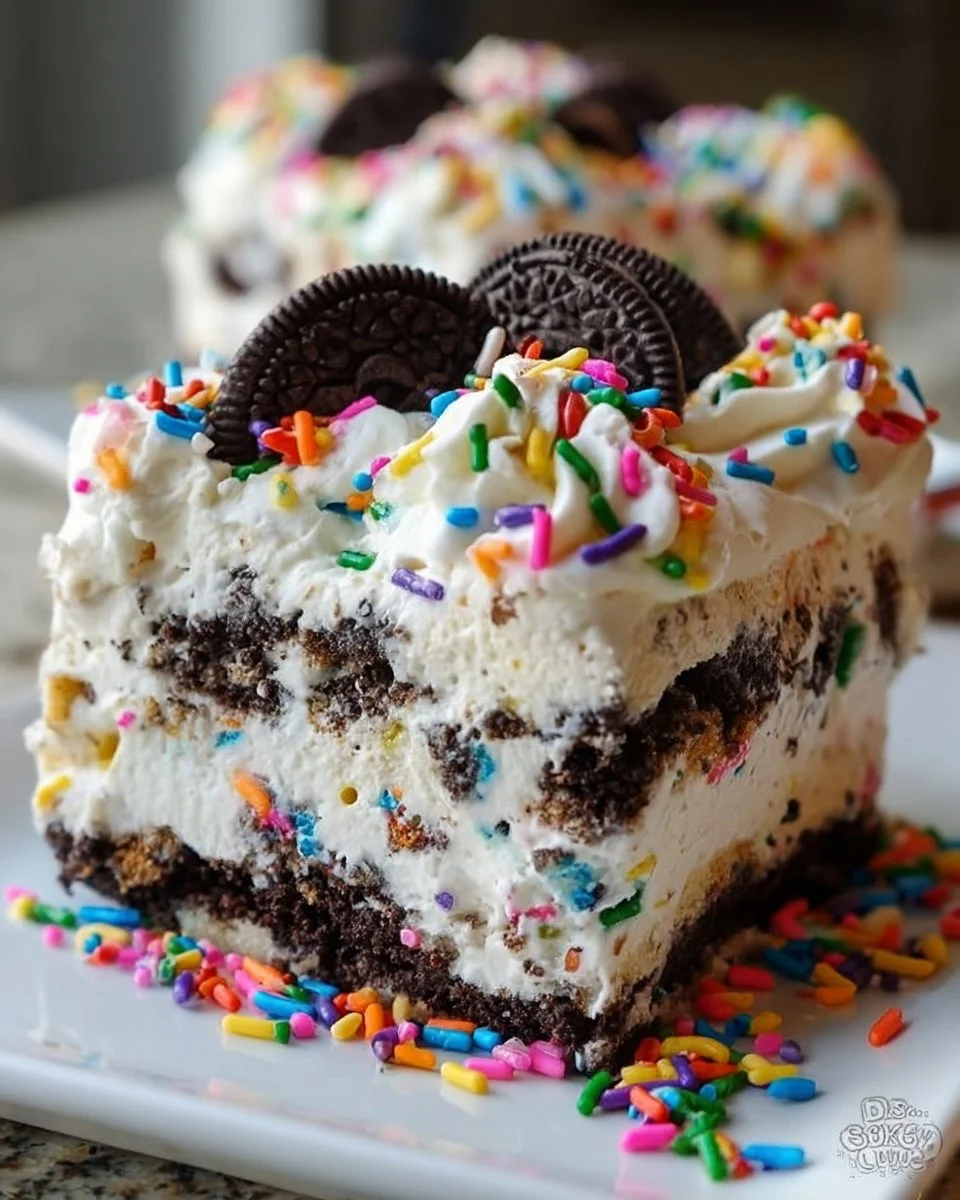
As the sun dips below the horizon, casting golden rays across your kitchen, the air fills with a sweet, dreamy anticipation. You unveil a dessert that promises joy in every bite: the No-Bake Funfetti Oreo Icebox Cake. This delectable creation stands as a joyful testament to childhood memories and celebrations yet to come. Each layer tells a story—crunchy, chocolatey Oreos meet creamy, fluffy layers in a dance that tantalizes your taste buds and warms your heart. The playful bursts of sprinkles add a confetti-like charm, embodying whimsy and festivity in every silky bite.
Imagine sinking your fork into this lush masterpiece, the crunch of Oreos giving way to an ethereal creaminess that envelops your senses. Sweetness plays with the subtle tang of cream cheese, while the sprinkles add delightful pops of color and texture. This cake isn’t just a dessert; it’s a celebration of life’s special moments—birthdays, family gatherings, or simply a mid-week pick-me-up that transforms any ordinary day into something extraordinary.
Why You’ll Love This No-Bake Funfetti Oreo Icebox Cake
You’ll fall head over heels for this No-Bake Funfetti Oreo Icebox Cake for its delightful simplicity and taste. It offers layers of flavor that evoke giddy childhood nostalgia. Its luscious creaminess combined with the satisfying crunch of Oreos creates a texture experience that captivates every palate. Not to mention, the vibrant sprinkles add that playful touch, making it perfect for celebrations or just as a well-deserved indulgence at home.
This no-bake dessert shines during warm weather, allowing you to surround yourself with loved ones instead of heating up the kitchen. Effortless to make, it will have your heart singing with glee, making it an inevitable hit at any gathering. The fact that it requires no oven means you can whip it together quickly, freeing your time for laughter, chatting, and savoring life’s many sweet moments.
Preparation Phase & Tools to Use
Creating this delightful icebox cake requires just a few essential tools that will make your cooking experience smooth and effortless. You’ll need:
- A Mixing Bowl: This is your go-to for blending ingredients to create a luscious cream cheese mixture.
- Hand Mixer or Stand Mixer: A hand mixer simplifies the process, whisking the cream cheese to a fluffy perfection in no time. If you opt for a stand mixer, it offers convenience, freeing your hands for other tasks.
- 9×9-inch Baking Dish: This dish serves as the canvas for your cake layers, allowing enough space for the beautiful assembly.
- Rubber Spatula: Perfect for folding in whipped cream, ensuring a gentle blend that retains all that airy goodness.
Preparation tips include having all ingredients at room temperature to facilitate merging flavors and ensuring a cohesive texture. Additionally, setting aside time for refrigeration is crucial; this period allows all ingredients to meld beautifully, elevating the flavor and texture.
Ingredients for No-Bake Funfetti Oreo Icebox Cake
- 1 package of Oreo cookies
- 1 package of cream cheese (8 oz)
- 1 cup of whipped cream
- 1/2 cup of sugar
- 1/4 cup of milk
- 1/4 cup of sprinkles
- 1 teaspoon of vanilla extract
Every ingredient plays an essential role in crafting this dreamy creation. The Oreo cookies provide a rich, chocolatey base with a satisfying crunch, a perfect counterpoint to the creamy layers. Cream cheese brings a slight tang and richness that enhances the overall flavor, while whipped cream introduces a voluminous lightness. Sugar sweetens the mixture, ensuring a perfect balance between flavors, and milk aids in softening the Oreos for that indulgent texture.
While each ingredient serves a specific purpose, feel free to swap for alternatives, if necessary. You might try a low-fat cream cheese for a lighter option or use dairy-free whipped cream to cater to dietary needs without compromising taste and texture.
How to Make No-Bake Funfetti Oreo Icebox Cake
- Begin by placing your softened cream cheese and sugar in a mixing bowl. Use a hand or stand mixer to beat them together until smooth and decadent.
- Fold in the whipped cream along with the vanilla extract, carefully incorporating these light elements to create a creamy, airy texture.
- In a separate dish, pour the milk, then dip each Oreo cookie briefly, allowing them to soak just enough before laying them flat in a single layer within your 9×9-inch dish.
- Generously spread a layer of your cream cheese mixture over the cookies, ensuring every nook and cranny is filled with that luscious goodness.
- Repeat the layering process, dipping and placing Oreos, followed by spreading more cream cheese mixture, until you reach the top. Finish with a lavish layer of cream cheese mixture on the very top.
- For the crowning touch, shower the surface with colorful sprinkles, creating a joyful, inviting appearance.
- Cover the dish with plastic wrap and refrigerate for at least 4 hours—overnight is even better!—allowing the flavors to marry to perfection.
- Finally, slice, serve, and watch as smiles light up the room!
Chef’s Notes & Helpful Tips
When making this delightful cake, consider making it a day ahead. The longer the icebox cake chills, the more fabulous it becomes, as the flavors deepen and meld beautifully.
For a unique twist, you can customize this dessert by using flavored whipped cream—try strawberry or chocolate for an exciting variation. Alternatively, experiment with different cookie layers like chocolate or vanilla wafers for added depth in flavor.
Feel free to explore healthier alternatives, utilizing Greek yogurt to replace some or all of the cream cheese for a lighter texture, or using natural sweeteners to cut back on sugar.
Common Mistakes to Avoid
- Over-soaking the Oreos: It’s easy to get carried away and leave the cookies in the milk too long. This can lead to mushiness. A quick dip—just a few seconds—is ideal.
- Not allowing enough chilling time: Rushing the refrigeration may prevent the cake from setting properly, causing it to lose structure. Patience yields the best results!
- Forgetting to use room temperature cream cheese: Cold cream cheese may not combine smoothly, leading to lumps in your cream mixture. Let it warm up!
- Skipping the sprinkles: It may seem trivial, but those sprinkles are not just decorations; they add texture and a burst of joy to every slice!
What to Serve With No-Bake Funfetti Oreo Icebox Cake
Pairing this delightful icebox cake with complementary flavors elevates the experience:
- Fresh Berries: Strawberries, raspberries, and blueberries offer a tart contrast, balancing the sweetness beautifully.
- Vanilla Ice Cream: A scoop of vanilla ice cream adds creaminess and temperature contrast that tantalizes the senses.
- Sweetened Whipped Cream: A dollop of whipped cream on the side creates a luxurious touch.
- Chocolate Sauce: Drizzling chocolate sauce amplifies that decadent chocolate flavor from the Oreos.
- Coffee or Espresso: A warm cup enhances flavors and complements the dessert perfectly, allowing the rich textures to shine.
- Sparkling Wine or Champagne: Treat yourself! The effervescence cuts through sweetness, making each bite feel special.
- Nutella or Cookie Butter: Serve alongside these rich options for those who crave an extra depth of flavor.
Storage & Reheating Instructions
Store leftover No-Bake Funfetti Oreo Icebox Cake tightly covered in the refrigerator for up to 3-5 days. If you want to prolong its life, you can freeze it. Simply wrap individual slices tightly in plastic wrap and place them in an airtight container; they’ll last for up to a month in the freezer.
To enjoy a frozen slice, transfer it to the fridge to thaw for a few hours before indulging. Avoid reheating in the microwave, as the cream may separate.
Estimated Nutrition Information
Approximate values per serving (based on 12 servings):
- Calories: 230
- Total Fat: 12g
- Saturated Fat: 7g
- Cholesterol: 40mg
- Sodium: 120mg
- Total Carbohydrates: 29g
- Dietary Fiber: 1g
- Sugars: 18g
- Protein: 2g
Nutrition values are estimates and may vary based on specific ingredients used and portion sizes.
FAQs
1. Can I use different cookies?
Absolutely! Vanilla wafers or even gluten-free cookies serve as excellent alternatives, allowing you to tailor the flavor while maintaining that delightful crunch.
2. Can I omit the sprinkles?
While the sprinkles add a festive touch, feel free to omit them if desired. Alternatively, use crushed nuts, chocolate chips, or coconut for topping.
3. How can I make this a chocolate version?
Swap out half of the cream cheese for chocolate cream cheese or mix in cocoa powder to the cream cheese layer to amplify the chocolate experience!
4. Is there a dairy-free option?
Yes! Utilize dairy-free cream cheese and whipped cream alternatives for a deliciously dairy-free version without compromising flavor.
5. Can I make this gluten-free?
Choose gluten-free Oreos or another suitable cookie alternative, and you can easily transform this treat into a gluten-free delight everyone can enjoy.
Conclusion
The No-Bake Funfetti Oreo Icebox Cake promises to whisk you away into a world of creamy, dreamy magic with every single slice. Its vibrant flavors and delightful textures create a joyous experience that celebrates life’s special moments. So gather your loved ones, and don your apron; this impressive yet simple dessert awaits to become a cherished favorite in your home. Embrace the joy of baking, and take that first delicious bite—an indulgent reward that transports you straight to happiness in every crumb.
Print
No-Bake Funfetti Oreo Icebox Cake
- Prep Time: 20 minutes
- Cook Time: 0 minutes
- Total Time: 240 minutes
- Yield: 12 servings 1x
- Category: Dessert
- Method: No Bake
- Cuisine: American
- Diet: Vegetarian
Description
A delightful no-bake dessert featuring layers of Oreos and creamy filling, topped with sprinkles.
Ingredients
- 1 package of Oreo cookies
- 1 package of cream cheese (8 oz)
- 1 cup of whipped cream
- 1/2 cup of sugar
- 1/4 cup of milk
- 1/4 cup of sprinkles
- 1 teaspoon of vanilla extract
Instructions
- Begin by placing your softened cream cheese and sugar in a mixing bowl. Use a hand or stand mixer to beat them together until smooth and decadent.
- Fold in the whipped cream along with the vanilla extract, carefully incorporating these light elements to create a creamy, airy texture.
- In a separate dish, pour the milk, then dip each Oreo cookie briefly, allowing them to soak just enough before laying them flat in a single layer within your 9×9-inch dish.
- Generously spread a layer of your cream cheese mixture over the cookies, ensuring every nook and cranny is filled with that luscious goodness.
- Repeat the layering process, dipping and placing Oreos, followed by spreading more cream cheese mixture, until you reach the top. Finish with a lavish layer of cream cheese mixture on the very top.
- For the crowning touch, shower the surface with colorful sprinkles, creating a joyful, inviting appearance.
- Cover the dish with plastic wrap and refrigerate for at least 240 minutes—overnight is even better!—allowing the flavors to marry to perfection.
- Finally, slice, serve, and watch as smiles light up the room!
Notes
Make a day ahead for best results. Customize by using flavored whipped cream or different cookie layers.
Nutrition
- Serving Size: 1 slice
- Calories: 230
- Sugar: 18g
- Sodium: 120mg
- Fat: 12g
- Saturated Fat: 7g
- Unsaturated Fat: 5g
- Trans Fat: 0g
- Carbohydrates: 29g
- Fiber: 1g
- Protein: 2g
- Cholesterol: 40mg