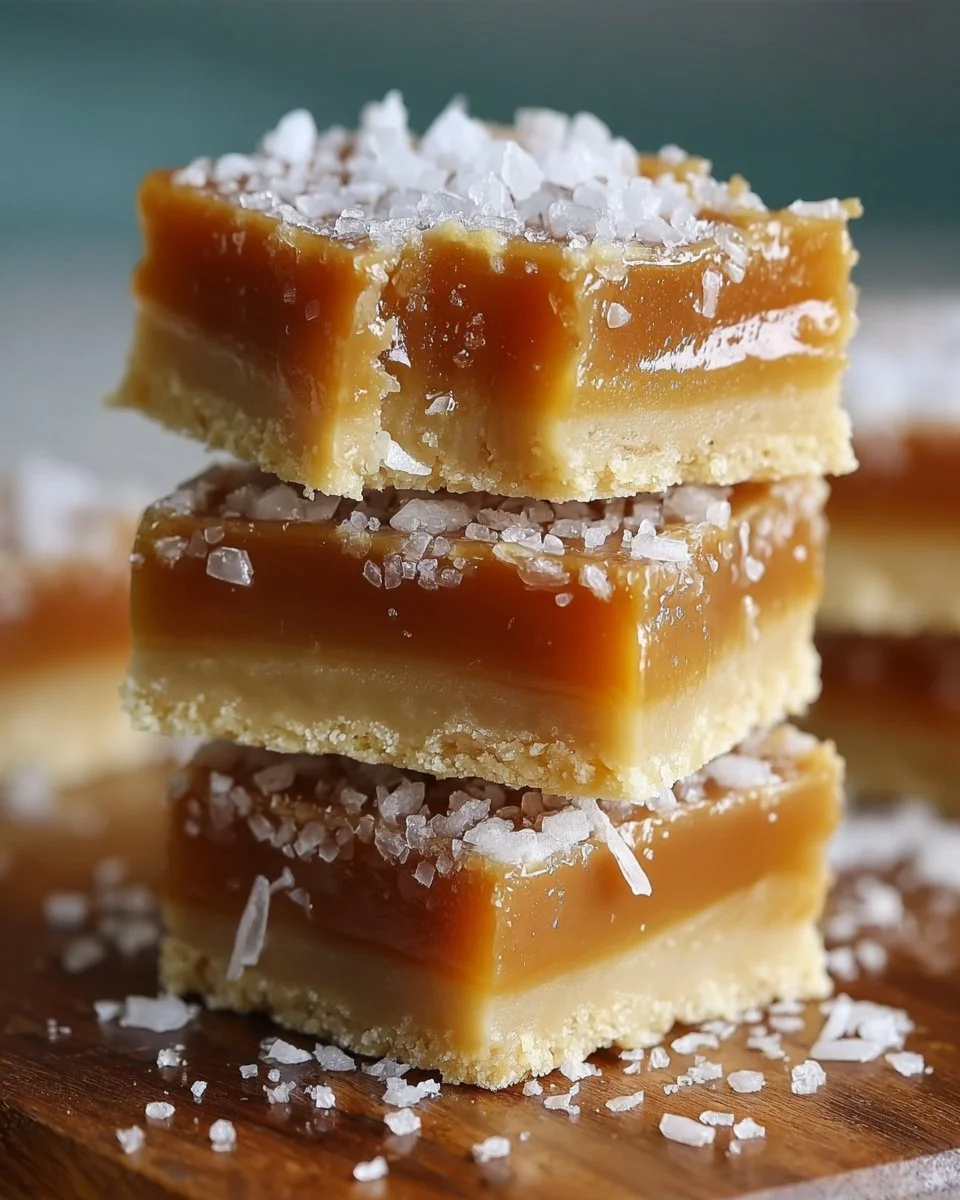
The aroma wafts through your kitchen, a symphony of caramel, butter, and just a hint of salt teasing your senses. Imagine buttery layers merging together, a soft crumble topping that gives way to a luscious caramel filling, all twinkling under a sprinkle of flaky sea salt. The moment you take your first bite, a rush of flavors ignites your taste buds—the rich sweetness of homemade caramel tempered by the savory saltiness, all cradled within a tender, buttery crust. These Salted Caramel Butter Bars promise an experience that transcends the ordinary; they become part of your cherished moments, your celebrations, and perhaps even your quiet, indulgent afternoons.
Biting into one of these bars feels akin to discovering a delightful secret nestled within your favorite dessert repertoire. The layers unfold beautifully, from the initially crisp base layer to the indulgently rich caramel core, and culminate in that sweet, buttery crumb that lingers lovingly on your palate. Each texture invites another bite; the crunch mingles with the smoothness of the gooey caramel, creating an irresistible contrast that beckons for just one more taste.
Why You’ll Love This Salted Caramel Butter Bars
Prepare to fall head over heels for these Salted Caramel Butter Bars. They merge simplicity with decadence, making them a perfect treat for any occasion. Perhaps you’re hosting a cozy gathering, looking for a standout dessert, or simply indulging yourself after a long week. These bars fit the bill beautifully, delighting both friends and family with their rich, satisfying taste.
They hold the unique charm of versatility. You can easily adapt them for festive seasons—add a sprinkle of cinnamon for a holiday twist, or infuse the caramel with a hint of espresso for a coffee lover’s dreams come true. Beyond the flavor, the preparation provides a delightful ritual, allowing you to pour your love into every layer. Once baked, they present an inviting appeal, with a warm, golden hue and a glistening finish that draws everyone in. Expect compliments and requests for the recipe; these bars delight not just the taste buds but also the hearts of all who gather around your table.
Preparation Phase & Tools to Use
Before diving into the culinary magic of these Salted Caramel Butter Bars, gather a few essential tools to make your baking experience smooth and enjoyable.
-
9×13-inch baking pan: This is your staging area for creating the layered bars, allowing for even baking and easy transport to the serving table.
-
Mixing bowls: Keep a couple on hand—one for wet ingredients and one for dry. This minimizes mess and simplifies the mixing process.
-
Whisk and spatula: Use these to mix and combine your ingredients thoroughly, ensuring a smooth, creamy consistency that elevates your bars.
-
Saucepan: Select a sturdy, preferably heavy-bottomed saucepan for making your caramel. This will help maintain an even heat and prevent burning.
-
Parchment paper: Line your baking pan with this magical material. It not only prevents sticking but also makes for hassle-free removal after baking.
Always remember a couple of preparation tips: soften your butter beforehand to make blending easier, and use room temperature eggs to create a smooth batter. These little adjustments yield a sublime texture, making your bars simply unforgettable.
Ingredients for Salted Caramel Butter Bars
Gather the following essential ingredients, ensuring each element plays its crucial role in crafting your delicious bars:
- 1 cup unsalted butter (softened to room temperature; 2 sticks / 226 g)
- 1 cup granulated sugar (200 g)
- 1/2 cup light brown sugar (packed; 100 g)
- 1 large egg (room temperature)
- 2 teaspoons pure vanilla extract
- 3 cups all-purpose flour (360 g)
- 1/2 teaspoon baking powder
- 1/2 teaspoon fine sea salt
- 1/2 cup unsalted butter (for caramel; 1 stick / 113 g)
- 1/2 cup light brown sugar (packed; for caramel, 100 g)
- 1/3 cup heavy cream (80 ml)
- 1/4 cup light corn syrup (60 ml; helps keep the caramel smooth and sliceable)
- 1 teaspoon pure vanilla extract (for caramel)
- 1/2-3/4 teaspoon flaky sea salt (for caramel, plus extra for sprinkling on top)
- 1/2 cup chopped pecans or walnuts (optional; sprinkle over caramel layer)
- 1/2 cup mini chocolate chips (optional; sprinkle on top of hot caramel)
- Nonstick spray (for preparing pan)
- Parchment paper (to line the pan)
Each ingredient serves a unique purpose, creating that signature taste and texture you’ll soon crave. Feel free to experiment too; for example, substitute walnuts for pecans or even add a dash of almond extract to elevate the flavor.
How to Make Salted Caramel Butter Bars
-
Preheat your oven to 325°F (165°C). Line your 9×13-inch baking pan with parchment paper, leaving an overhang on the long sides for easy lifting later. Lightly spray the parchment with nonstick spray.
-
In a large mixing bowl, combine the softened butter, granulated sugar, and brown sugar. Beat these together until the mixture becomes smooth and creamy.
-
Once well combined, add in the egg and vanilla extract, mixing until fully incorporated.
-
In a separate bowl, whisk together the flour, baking powder, and fine sea salt. Gradually add this dry mixture to the butter blend, stirring until a soft, crumbly dough forms. This dough should hold together when pressed.
-
Take about 2/3 of this dough and transfer it to the prepared pan. Press it firmly and evenly into the bottom of the pan, ensuring you get into the corners. Reserve the remaining dough in the refrigerator.
-
Bake the base layer for about 18–20 minutes, or until it starts turning a light golden around the edges. Avoid over-baking; a slightly undercooked base adds to the experience.
-
While the crust bakes, make your rich caramel filling. In a medium saucepan, combine the butter, brown sugar, heavy cream, and light corn syrup. Set over medium heat, stirring frequently until the mixture begins to bubble gently.
-
Once bubbling, continue to cook for 3–4 minutes, stirring constantly until slightly thickened and glossy. Remove from the heat, mix in the vanilla and ½ teaspoon of flaky sea salt. Taste carefully; if you desire a stronger flavor, add a touch more salt.
-
Let the caramel cool for about 5 minutes—it will thicken slightly. Pour it evenly over your baked crust, and if desired, sprinkle on the chopped nuts and/or mini chocolate chips.
-
Crumble the reserved dough over the caramel layer without pressing it flat; let small clumps remain with caramel peeking through for added texture.
-
Return the pan to the oven and bake for an additional 22–28 minutes, until the top is light golden and the edges are bubbling ever so slightly. If you notice it browning too quickly, tent the pan loosely with foil for the last 5 minutes.
-
Once done, take the pan out and place it on a wire rack. While still warm, sprinkle the top with additional flaky sea salt. Allow the bars to cool completely in the pan for about 2–3 hours at room temperature. For cleaner slices, chill in the refrigerator for 45–60 minutes afterward.
-
Using the parchment overhang, lift the slab of bars from the pan and place it on a cutting board. Slice into 16 large or up to 24 smaller bars, wiping the knife clean between cuts. Serve at room temperature, and watch the smiles grow around you.
Chef’s Notes & Helpful Tips
-
Make-ahead tips: Prepare your caramel filling a day in advance and store it in the refrigerator. Warm it slightly before pouring over the crust for a delightful treat.
-
Cooking alternatives: If you prefer an air fryer, try adjusting your baking time to 10-15 minutes at 300°F (150°C).
-
Customization ideas: Drizzle melted chocolate over the cooled bars for a decadent finishing touch, or swap out the vanilla for different extracts like almond or hazelnut.
Common Mistakes to Avoid
-
Overbaking the base: Watch your crust closely; a light golden hue is ideal. Overbaking will lead to a dry texture that detracts from the overall experience.
-
Rushing the caramel: Patience is key! Stir constantly to avoid scorching, and allow it to cool slightly before pouring.
-
Not letting cool completely: Resist the urge to cut into the bars too soon. They need time to set properly for neat slices.
What to Serve With Salted Caramel Butter Bars
These delightful bars pair beautifully with a variety of accompaniments, including:
-
Vanilla ice cream: A scoop of creamy vanilla ice cream melts harmoniously into the caramel, creating a rave-worthy dessert experience.
-
Fresh coffee: Brewed coffee’s bitterness balances the sweetness and enhances the flavors, making it a perfect afternoon treat.
-
Whipped cream: A dollop of lightly sweetened whipped cream will bring a cloud-like softness to your indulging experience.
-
Tea: Pair these bars with a fragrant chai or floral tea for a cozy afternoon delight.
-
Fruit salad: Fresh berries or citrus brighten the plate and cleanse the palate between bites.
-
Nutty toppings: Serve alongside a handful of spiced nuts for an added crunch that contrasts deliciously with the tender bars.
Storage & Reheating Instructions
Store your Salted Caramel Butter Bars in an airtight container at room temperature for up to five days. For longer storage, wrap them tightly and place them in the refrigerator to extend their life to about a week. If preferred, you can also freeze the bars. Wrap them individually in plastic wrap and then place them in a freezer bag for up to 2 months. To enjoy, let them thaw at room temperature, or warm them up slightly in the microwave for that fresh-baked feel.
Estimated Nutrition Information
Approximate values based on a serving size of one bar (based on 24 servings):
- Calories: 210
- Fat: 10 g
- Carbohydrates: 30 g
- Protein: 2 g
- Sugar: 15 g
(Please note that values may vary based on specific ingredients and portion sizes.)
FAQs
Can I substitute the butter for a non-dairy option?
Absolutely! Use vegan butter as a perfect substitute, ensuring the same creamy consistency in your bars.
What if my caramel doesn’t thicken?
If the caramel appears runny, return it to the heat for a few more minutes, stirring to reheat gently, allowing for thickening.
What’s the best way to cut these bars?
Chill the bars in the fridge for about an hour to set, then use a sharp knife, wiping it clean between cuts for neat slices.
How can I make these bars gluten-free?
Substitute the all-purpose flour with a gluten-free flour blend, and be sure to check that all other ingredients are gluten-free.
Can I double this recipe?
Yes, simply double the ingredients and use a larger baking pan for thick, decadent bars.
Conclusion
Indulging in these Salted Caramel Butter Bars invites joy and comfort, making them the perfect treat for any occasion, big or small. The combination of flavors and textures creates a delightful experience that you and your loved ones will savor together. They inspire not only culinary creativity but also cherished moments filled with laughter and sweet indulgence. So, gather your ingredients, embrace the aroma of buttery joy, and create a sweet memory today.
Print
Salted Caramel Butter Bars
- Prep Time: 15 minutes
- Cook Time: 50 minutes
- Total Time: 1 hour 5 minutes
- Yield: 24 servings 1x
- Category: Dessert
- Method: Baking
- Cuisine: American
- Diet: Vegetarian
Description
Indulge in rich, buttery layers with a luscious caramel filling and a hint of flaky sea salt. Perfect for any occasion.
Ingredients
- 1 cup unsalted butter (softened to room temperature; 2 sticks / 226 g)
- 1 cup granulated sugar (200 g)
- 1/2 cup light brown sugar (packed; 100 g)
- 1 large egg (room temperature)
- 2 teaspoons pure vanilla extract
- 3 cups all-purpose flour (360 g)
- 1/2 teaspoon baking powder
- 1/2 teaspoon fine sea salt
- 1/2 cup unsalted butter (for caramel; 1 stick / 113 g)
- 1/2 cup light brown sugar (packed; for caramel, 100 g)
- 1/3 cup heavy cream (80 ml)
- 1/4 cup light corn syrup (60 ml)
- 1 teaspoon pure vanilla extract (for caramel)
- 1/2–3/4 teaspoon flaky sea salt (for caramel, plus extra for sprinkling on top)
- 1/2 cup chopped pecans or walnuts (optional)
- 1/2 cup mini chocolate chips (optional)
- Nonstick spray (for preparing pan)
- Parchment paper (to line the pan)
Instructions
- Preheat your oven to 325°F (165°C). Line your 9×13-inch baking pan with parchment paper, leaving an overhang for easy lifting later. Lightly spray the parchment with nonstick spray.
- Combine the softened butter, granulated sugar, and brown sugar in a large mixing bowl. Beat until the mixture becomes smooth and creamy.
- Add in the egg and vanilla extract, mixing until fully incorporated.
- Whisk together the flour, baking powder, and fine sea salt in a separate bowl. Gradually add this to the butter blend, stirring until a soft, crumbly dough forms.
- Transfer about 2/3 of the dough to the prepared pan, pressing it firmly into the bottom. Reserve the remaining dough in the refrigerator.
- Bake the crust for about 18–20 minutes until it starts turning light golden. Avoid over-baking.
- Make the caramel filling by combining the butter, brown sugar, heavy cream, and light corn syrup in a medium saucepan. Cook over medium heat until it begins to bubble gently.
- Cook for 3–4 minutes, stirring constantly until slightly thickened and glossy. Remove from heat, mix in the vanilla and ½ teaspoon of flaky sea salt.
- Let the caramel cool for about 5 minutes, then pour it evenly over the baked crust and sprinkle the optional nuts and/or mini chocolate chips.
- Crumble the reserved dough over the caramel layer without pressing it flat.
- Return the pan to the oven and bake for an additional 22–28 minutes until the top is light golden.
- Cool completely in the pan for about 2-3 hours at room temperature, then chill in the refrigerator for 45–60 minutes for cleaner slices.
Notes
For make-ahead tips, prepare your caramel filling a day in advance and store in the refrigerator. Drizzle melted chocolate over cooled bars for a finishing touch.
Nutrition
- Serving Size: 1 bar
- Calories: 210
- Sugar: 15g
- Sodium: 200mg
- Fat: 10g
- Saturated Fat: 6g
- Unsaturated Fat: 4g
- Trans Fat: 0g
- Carbohydrates: 30g
- Fiber: 1g
- Protein: 2g
- Cholesterol: 30mg