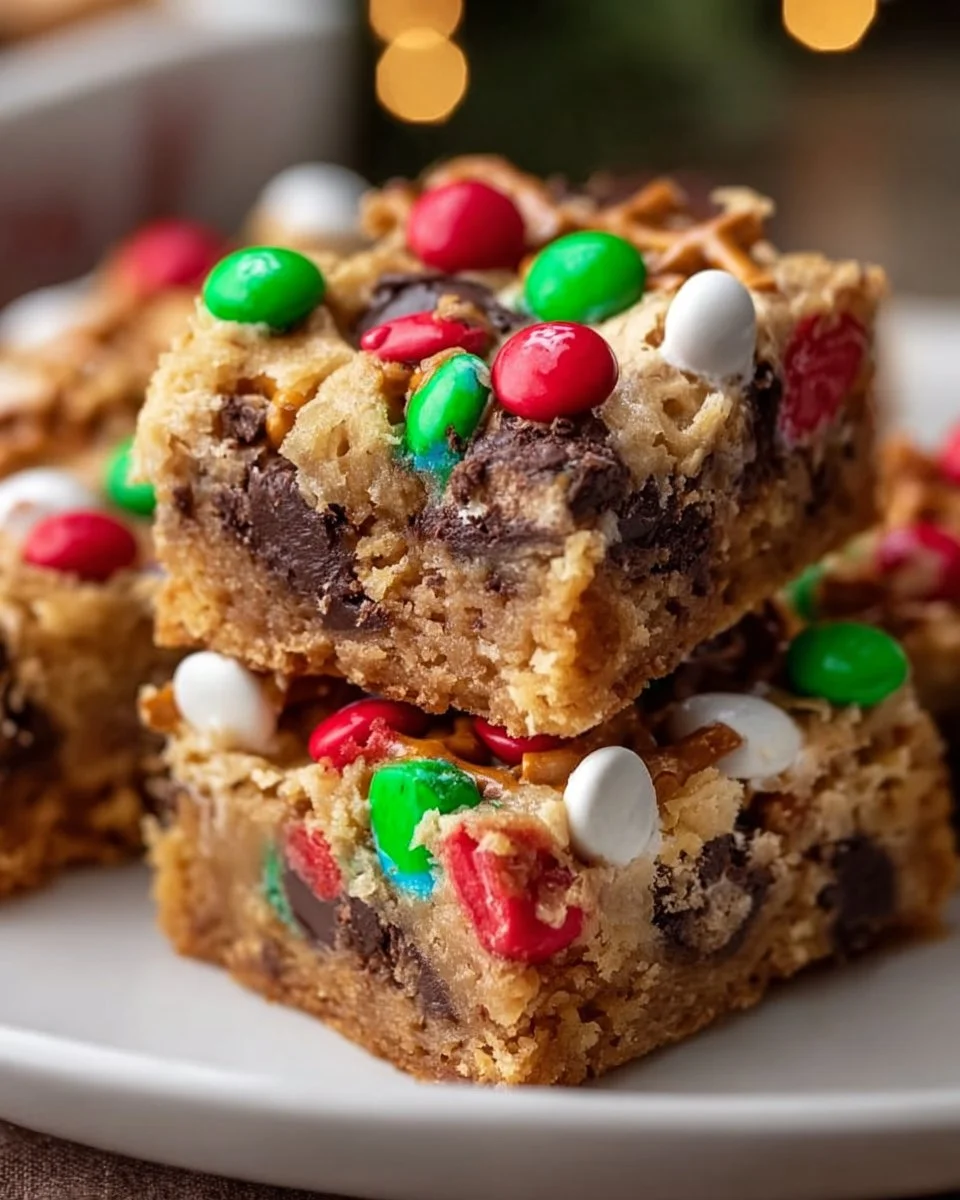
The holidays approach with a delightful mix of expectancy and nostalgia, bringing with them a treasured medley of flavors. Among the whirl of festive aromas, nothing quite captures the essence of the season like homemade treats. Imagine a warm, buttery cookie bar, bursting with vibrant colors and irresistible textures. Santa’s Trash Cookie Bars embody this whimsy perfectly, transforming the chaotic charm of leftovers into something magical. Each bite unveils a treasure trove of crunchy pretzels, creamy chocolate, and bright, chewy candies, all harmonizing together in a beautifully chaotic celebration of taste.
As the sweet scent of melting chocolate wafts through your kitchen, you can’t help but feel enveloped in the warmth of the season. The edges of these cookie bars turn a delightful golden brown while the center remains soft and chewy, creating a textural contrast that dances across your palate. With every mouthful, the blend of sweet and salty delights strikes a perfect balance, offering a comforting reminder of childhood baking sessions and the joyous spirit of family gatherings. Whether served at a holiday party or savored solo in your favorite chair, these bars bring a sprinkle of enchantment to any moment.
Why You’ll Love This Santa’s Trash Cookie Bars
Santa’s Trash Cookie Bars shine as a star in the holiday baking lineup for numerous reasons. Not only do they encapsulate the joyful hodgepodge of festive flavors, but they also beckon creativity from the cook. Perfect for holiday gatherings, these bars make a phenomenal addition to cookie trays, gifting, and after-dinner treats. They offer an effortless way to impress guests while spreading feelings of comfort and warmth amid the chilly winter nights.
Each bite bursts with flavor — from the rich, creamy chocolate chips to the salty crunch of crispy pretzels, and the vibrant pop of holiday candy. You can feel the joy of the season in each piece, making these bars a tangible celebration of all that is good decandent and sweet. Their whimsical appearance and delightful texture not only spark curiosity but also invite sharing amongst friends and family, fostering moments of togetherness that define the holiday spirit.
Preparation Phase & Tools to Use
Creating Santa’s Trash Cookie Bars is a joyful journey that requires just a few essential tools to help you every step of the way. Gather your:
-
Mixing bowls: A large bowl for combining your wet ingredients and a medium bowl for dry ingredients help keep your kitchen organized and make prep a breeze.
-
Electric mixer: This tool saves time and energy when creaming together the butter and sugars, ensuring a smooth and creamy mixture that forms the base of your bars.
-
Rubber spatula: Perfect for scraping down the sides of the bowl and ensuring every ingredient gets fully incorporated, resulting in perfectly blended bars.
-
9×13 inch baking pan: A must-have for baking, allowing your bars to cook evenly and making for easy cutting once cooled.
-
Silicone spatula or knife: Ideal for cutting and serving those perfectly baked squares without damaging their delicate structure.
To maximize flavor and minimize mess, ensure your butter is at room temperature before starting, allowing it to cream beautifully with the sugars. This step enhances the end product, yielding chewy bars that win hearts.
Ingredients for Santa’s Trash Cookie Bars
The magic of Santa’s Trash Cookie Bars occurs thanks to a harmonious blend of simple but essential ingredients:
- 1 cup butter, softened
- 1 cup brown sugar
- 1 cup granulated sugar
- 2 large eggs
- 1 teaspoon vanilla extract
- 3 cups all-purpose flour
- 1 teaspoon baking soda
- 1/2 teaspoon salt
- 1 cup chocolate chips
- 1 cup crushed pretzels
- 1 cup colorful holiday candies
Butter and Sugars: Using both brown and granulated sugar creates a rich caramel flavor and enhanced texture. For a twist, substitute half of the butter with unsweetened applesauce to reduce saturation while preserving moisture.
Eggs: They bind everything together, ensuring your bars maintain their shape yet remain soft and chewy. Substitute with flax eggs for a vegan option.
Flour, Baking Soda, and Salt: All-purpose flour gives a sturdy structure, while baking soda helps the bars rise perfectly for a light touch.
Crushed Pretzels & Holiday Candies: The surprising inclusion of pretzels adds an addictively salty crunch, perfectly complementing the sweetness of chocolate and vibrant candies. Feel free to swap them with your favorite nuts or dried fruit for a personalized touch.
How to Make Santa’s Trash Cookie Bars
Now, let’s bring the magic of these bars to life with a straightforward step-by-step guide:
-
Preheat your oven to 350°F (175°C) and grease a 9×13 inch baking pan for easy removal of the bars later.
-
Cream the butter and sugars: In a large bowl, combine softened butter, brown sugar, and granulated sugar. Beat with an electric mixer until the mixture is smooth and fluffy.
-
Incorporate the eggs: Add eggs, one at a time, blending well after each addition, followed by the vanilla extract. The mixture should look creamy and inviting.
-
Mix the dry ingredients: In a separate bowl, whisk together the flour, baking soda, and salt thoroughly.
-
Combine wet and dry: Gradually add the flour mixture to the creamy blend, stirring until just incorporated. Avoid over-mixing to preserve the tenderness of the bars.
-
Fold in the good stuff: Gently fold in the chocolate chips, crushed pretzels, and colorful holiday candies, distributing them evenly with a rubber spatula.
-
Spread evenly: Transfer the dough to the prepared baking pan, spreading it out evenly to ensure consistent baking.
-
Bake to perfection: Place the pan in the preheated oven and bake for 25-30 minutes, or until the edges turn golden brown and the center feels set but still slightly soft.
-
Cool and cut: Allow your cookie bars to cool in the pan before cutting them into squares. The wait will be worth it as the aroma fills your home!
Chef’s Notes & Helpful Tips
-
Make-ahead tips: You can prepare the dough and refrigerate it overnight. Just allow it to come to room temperature before baking for optimal results.
-
Cooking alternatives: If you’re short on time, consider using an air fryer to bake smaller batches of these cookie bars; just adjust the time and temperature accordingly.
-
Customization ideas: Experiment with different add-ins, like coconut flakes or seasonal spices such as cinnamon and nutmeg, to amplify the holiday flavor profile.
Common Mistakes to Avoid
Creating perfect Santa’s Trash Cookie Bars involves careful attention to detail:
-
Overmixing the dough: This can lead to tough bars, so mix only until ingredients combine.
-
Not measuring flour properly: Too much flour can dry out your bars. Use the spoon-and-level method for accurate measurement.
-
Underbaking: Allowing the bars to cool in the pan helps them set properly. Keep an eye on them; they can go from perfectly baked to overdone quickly.
What to Serve With Santa’s Trash Cookie Bars
Enhance your holiday gathering with delightful pairings for your cookie bars:
-
Hot cocoa: A rich and creamy cup offers the perfect complement, enhancing the chocolate goodness.
-
Coffee: The notes of coffee make a delightful contrast, highlighting the sweetness of the bars.
-
Eggnog: The festive flavor of eggnog pairs beautifully with the delightful chaos of these cookie bars, making each bite feel more special.
-
Milk: The classic pairing never goes out of style and can bring out the delightful chocolate flavors.
-
Ice cream: Top with a scoop of your favorite flavor for a warm and cold contrast that’s to die for.
-
Fruit salad: A fresh fruit salad can provide a refreshing balance to the sweetness.
-
Cheese platter: A selection of cheeses can elevate the experience further, playing off the salty pretzel flavor.
Storage & Reheating Instructions
Store any leftover cookie bars in an airtight container at room temperature for up to five days. For longer storage, freeze them in a single layer separated by parchment paper, then transfer to a freezer-safe container for up to three months. When ready to enjoy, simply allow them to thaw at room temperature or pop them in the microwave for a few seconds for that warm, gooey goodness.
Estimated Nutrition Information
Each piece contains approximately 200 calories, with values varying based on size and added ingredients. Enjoy these delicious treats mindful of your dietary goals, and always indulge in moderation!
FAQs
1. Can I make these cookie bars gluten-free?
Absolutely! Use a gluten-free 1:1 baking flour in place of regular all-purpose flour, ensuring to check the ingredients of your add-ins as well.
2. Can I substitute different add-ins for the candies and pretzels?
Certainly! Get creative with your favorite nuts, dried fruits, or even a swirl of peanut butter for added richness.
3. How do I know when the cookie bars are done baking?
Look for golden edges and a slightly soft center. The bars will continue to set as they cool, so don’t worry if the center seems a little underbaked.
4. Can I double the recipe?
Yes, double the ingredients for a larger batch. Adjust the baking time if using a larger pan and keep an eye on them!
5. What’s the best way to cut these bars?
Use a sharp knife, wiping it clean between cuts to maintain neat edges for perfect presentation.
Conclusion
With their inviting aroma and delightful mix of textures, Santa’s Trash Cookie Bars offer a nostalgic taste of the holidays. Each bite celebrates not only the holiday spirit but also fosters a sense of community as friends and family come together to enjoy these magical treat. So why not don your apron, gather your loved ones, and create a batch today? The joy and memories you’ll make will become part of your family’s holiday tradition, promising delightful moments alongside every scrumptious bite. Embrace the spirit of the season and let these cookie bars bring happiness to your home!
Print
Santa’s Trash Cookie Bars
- Prep Time: 15 minutes
- Cook Time: 30 minutes
- Total Time: 45 minutes
- Yield: 16 servings 1x
- Category: Dessert
- Method: Baking
- Cuisine: American
- Diet: Vegetarian
Description
Delightful cookie bars bursting with crunchy pretzels, creamy chocolate, and colorful holiday candies, perfect for festive gatherings.
Ingredients
- 1 cup butter, softened
- 1 cup brown sugar
- 1 cup granulated sugar
- 2 large eggs
- 1 teaspoon vanilla extract
- 3 cups all-purpose flour
- 1 teaspoon baking soda
- 1/2 teaspoon salt
- 1 cup chocolate chips
- 1 cup crushed pretzels
- 1 cup colorful holiday candies
Instructions
- Preheat your oven to 350°F (175°C) and grease a 9×13 inch baking pan.
- Cream the butter and sugars in a large bowl until smooth and fluffy using an electric mixer.
- Incorporate the eggs, one at a time, blending well after each addition, followed by the vanilla extract.
- Mix the dry ingredients in a separate bowl, whisking together the flour, baking soda, and salt.
- Combine the wet and dry ingredients, stirring until just incorporated.
- Fold in the chocolate chips, crushed pretzels, and holiday candies.
- Spread the dough evenly in the prepared baking pan.
- Bake for 25-30 minutes, until the edges are golden brown and the center feels set but slightly soft.
- Cool in the pan before cutting into squares.
Notes
Try using unsweetened applesauce as a twist to reduce saturation while preserving moisture. Customize with your favorite nuts or fruits.
Nutrition
- Serving Size: 1 square
- Calories: 200
- Sugar: 15g
- Sodium: 400mg
- Fat: 10g
- Saturated Fat: 5g
- Unsaturated Fat: 3g
- Trans Fat: 0g
- Carbohydrates: 25g
- Fiber: 1g
- Protein: 2g
- Cholesterol: 40mg