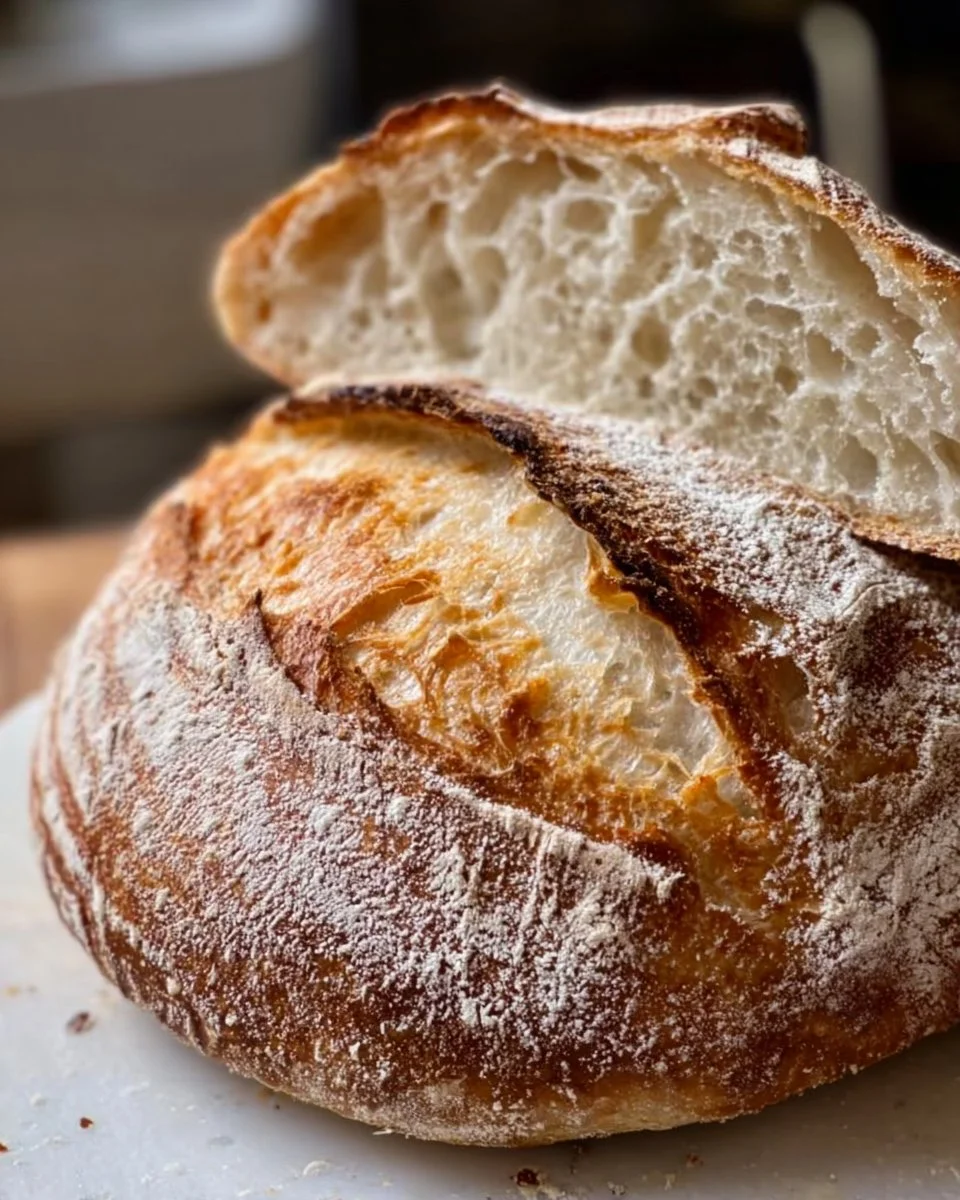
Sourdough baking is an artistic journey where patience and passion blend seamlessly, culminating in the real magic of oven spring. Imagine the moment when your bread, lovingly nurtured over hours, puffs up in the oven, unleashing a burst of golden crust and a tantalizing aroma that envelops your kitchen. That’s the essence of perfecting oven spring—a wondrous transformation that not only elevates the appearance of your loaf but enhances its structure, creating a bread that’s crispy on the outside and beautifully airy within. You can almost taste the earthy, nutty notes dancing on your palate as you slice through the crust and reveal the tender, chewy crumb inside.
The experience doesn’t end with the visual allure of your sourdough; it’s a sensory delight. As you tear into a freshly baked loaf, your fingers enjoy the delicate warm steam wafting upward, while your ears revel in that satisfying crunch that signals a well-baked crust. Each bite delivers the joy of a perfectly fermented dough, with complex flavors that only time, patience, and the fermentation process can impart. Your kitchen becomes a nurturing haven, filled with the rich, tangy scent of sourdough that welcomes everyone in, making it hard to resist a slice—freshly buttered or topped with your favorite spreads.
Why You’ll Love This Sourdough Recipe
This sourdough recipe will capture not only your heart but also your taste buds! Firstly, enjoying the fruits of your labor in the form of beautifully baked sourdough brings an unmatched sense of accomplishment. The process teaches you more than just baking; it teaches you patience and an appreciation for the natural fermentation of ingredients. Each loaf resonates with a unique flavor profile, reflecting the conditions in which it was baked—a personal touch in every bite.
Whether you intend to impress guests at a dinner party or simply indulge in a cozy weekend morning, the magnificence of oven spring enhances any occasion. Serving freshly baked sourdough, with its alluring golden crust and airy, chewy crumb, immediately elevates the atmosphere of your gathering. Each loaf tells a story, inviting others to savor the simple joys of homemade bread, making it the star of breakfast tables, toast for lunch, or even a delightful accompaniment to soups and salads.
Preparation Phase & Tools to Use
To embark on your sourdough journey, equipping yourself with the right tools will elevate your baking game. Here are essential tools that can make a significant difference:
- Kitchen Scale: Precision in measurement helps ensure consistent results, making this a must-have for serious bakers.
- Dutch Oven: This creates an ideal steam environment during baking, crucial for that sought-after crust and oven spring.
- Bench Knife: Perfect for shaping and maneuvering your dough, it becomes an extension of your hands as you work.
- Proofing Basket: This helps your dough hold its shape while it rises, contributing to a well-formed loaf.
- Lame or Sharp Knife: For scoring your loaf, a sharp edge allows for beautiful patterns and controls how your bread expands in the oven.
Preparation tip: Embrace the process! Before starting, take a moment to gather all ingredients and tools, ensuring a smooth baking experience.
Ingredients for Sourdough
Crafting the perfect sourdough starts with understanding your ingredients:
- Bread Flour: The backbone of your loaf, this flour has a high protein content, lending a wonderful structure.
- Water: A critical component, the quality of water can affect your dough. Use filtered water for best results.
- Salt: This enhances flavor and regulates yeast activity, promoting a balanced fermentation.
- Sourdough Starter: This live culture is your secret weapon, the key to flavor and rise. If you don’t have one, consider starting your own!
Don’t hesitate to explore alternatives where needed—whole wheat flour can add depth, while a bit of honey can introduce a touch of sweetness to the mix.
How to Make Sourdough
Here’s how to bring your loaf from dough to delightful reality, step by step:
- Mixing the Dough: In a bowl, combine 500g of bread flour, 350g of warm water, and 100g of sourdough starter. Use your hand to mix until there are no dry bits remaining.
- Autolyse: Let your dough rest for about 30 minutes. This allows the flour to absorb the water, promoting gluten development.
- Add Salt: Sprinkle 10g of salt over the dough. Wet your hand, then pinch and fold to incorporate the salt fully.
- Bulk Fermentation: Cover the bowl and let it rise at room temperature for 4–5 hours. This is where the magic begins! Every 30–45 minutes, perform a series of stretch and folds in the bowl for structure development.
- Pre-shaping: Turn the dough onto a floured surface, gently shape it into a ball, and let it rest for 20 minutes.
- Final Shaping: Shape your dough into a tighter ball. Use your bench knife to ensure a smooth top by folding the edges into the center.
- Proofing: Place your shaped dough into a proofing basket, seam side up. Cover it and let it rise for 2–4 hours or in the fridge overnight for a deeper flavor.
- Preheat the Oven: About 30 minutes before baking, place your Dutch oven in the oven and preheat to 450°F (232°C).
- Scoring: Once preheated, carefully remove the Dutch oven and invert your dough onto parchment paper. Use a lame or sharp knife to score the top; this controls steam and expansion in baking.
- Baking: Carefully place the dough in the Dutch oven, cover, and bake for 30 minutes. Remove the lid and bake for another 15 minutes until dark golden brown and the crust shines.
- Cooling: Allow your loaf to cool completely before slicing. This waiting period helps set the crumb structure.
Chef’s Notes & Helpful Tips
- Make-ahead Tips: Sourdough benefits from overnight fermentation; consider prepping your dough in the evening to bake fresh bread in the morning.
- Cooking Alternatives: If you don’t have a Dutch oven, try baking on a preheated stone, placing a pan with water at the bottom for steam.
- Customization Ideas: Add herbs, cheese, or nuts during the first mix to create unique flavor variations. Want some sweetness? Dried fruits could be a delightful addition.
Common Mistakes to Avoid
A few pitfalls may haunt your sourdough journey:
- Under or Overproofing: Watch the dough; it should have grown significantly but not doubled. A finger poke test can determine readiness.
- Inconsistent Temperatures: Too hot or too cold impacts fermentation. Maintain a steady temperature for best results.
- Neglecting Steam: Failing to create steam can lead to a dense crust. Always cover your baking vessel initially or add water to the oven.
What to Serve With Sourdough
Once you’ve mastered the art of sourdough, consider these delicious pairings:
- Homemade Butter: Slather on fresh butter for a classic indulgence, allowing the creamy richness to enhance the bread’s tang.
- Olive Oil and Balsamic Vinegar: Drizzle for a delightful appetizer, balancing the nuttiness of the loaf with tangy flavors.
- Soups: A hearty vegetable or creamy tomato soup complements the crust wonderfully, making every bite comforting.
- Cheese Board: Pair with various cheeses to create a culinary experience, contrasting the bread’s texture with smooth and crumbly varieties.
- Avocado Toast: Spread mashed avocado topped with chili flakes for a trendy breakfast option bursting with flavor.
- Charcuterie: Use slices in a charcuterie board, allowing guests to explore textures and flavors with meats, fruits, and spreads.
- Salads: Enjoy alongside a fresh salad, with its crunch enhancing the meal’s overall composition while soaking up dressings.
Storage & Reheating Instructions
To preserve your sourdough, follow these guidelines:
- Fridge: Store uneaten bread in a paper bag to maintain crispy crust; wrap in plastic to prevent it from drying out.
- Freezer: Slice and freeze bread pieces in an airtight container for up to three months. Thaw at room temperature before toasting.
- Reheating: Refresh stale bread in a hot oven for 10-15 minutes to revive its crunch.
Estimated Nutrition Information
While exact values can vary, here’s an approximate nutrition breakdown per slice:
- Calories: 90
- Protein: 3g
- Carbohydrates: 18g
- Fat: 0g
- Fiber: 1g
Disclaimer: Nutritional content may vary based on specific ingredients and measurements used.
FAQs
What’s the best way to know when my sourdough is done baking?
The loaf should be golden brown and sound hollow when tapped on the bottom. An internal thermometer should read around 200°F (93°C).
How can I reactivate my sourdough starter?
Feed your starter with equal parts flour and water and allow it to sit at room temperature. It should start to bubble within a few hours.
Why did my sourdough not rise?
Factors like old starter, incorrect measurements, or inadequate fermentation time may hinder its rise. Always check the activity of your starter before use.
Can I use all-purpose flour instead of bread flour?
Yes, but the bread may not rise as nicely. Bread flour provides more structure due to higher protein content.
What if the dough is too wet?
If your dough appears too sticky, sprinkle in a little more flour during mixing. However, don’t overdo it; a slightly wet dough leads to a crunchier bread.
Conclusion
Baking sourdough bread is a delightful blend of science and art, a process that nurtures both the bread and the baker. It’s not just about the final result; it’s about the journey—watching your dough transform, inhaling that irresistible aroma, and savoring each slice that tells a story. As you refine your technique and embrace the joy of oven spring, you become part of a rich tradition that spans centuries, enriching your home and palate.
For further exploration of sourdough techniques, dive into Sourdough Baking Secrets: Mastering Dough Extensibility or discover more about the perfect loaf in In Search of the Perfect Loaf. Enjoy each delicious moment and let your culinary adventure continue!
Print
Artisan Sourdough Bread
- Prep Time: 90 minutes
- Cook Time: 45 minutes
- Total Time: 135 minutes
- Yield: 1 loaf 1x
- Category: Baking
- Method: Baking
- Cuisine: French
- Diet: Vegetarian
Description
Experience the art of sourdough baking with this detailed guide to creating a perfectly airy and crusty loaf.
Ingredients
- 500g Bread Flour
- 350g Warm Water
- 100g Sourdough Starter
- 10g Salt
Instructions
- Mix the dough: In a bowl, combine 500g of bread flour, 350g of warm water, and 100g of sourdough starter. Use your hand to mix until there are no dry bits remaining.
- Autolyse: Let your dough rest for about 30 minutes.
- Add salt: Sprinkle 10g of salt over the dough. Wet your hand, then pinch and fold to incorporate the salt fully.
- Bulk fermentation: Cover the bowl and let it rise at room temperature for 4–5 hours.
- Pre-shaping: Turn the dough onto a floured surface and gently shape it into a ball, then let it rest for 20 minutes.
- Final shaping: Shape your dough into a tighter ball.
- Proofing: Place your shaped dough into a proofing basket, seam side up, and let it rise for 2–4 hours.
- Preheat the oven: About 30 minutes before baking, preheat your Dutch oven to 450°F (232°C).
- Score: Invert your dough onto parchment paper and score the top.
- Bake: Place the dough in the Dutch oven, cover, and bake for 30 minutes. Remove the lid and bake for another 15 minutes.
- Cool the loaf completely before slicing.
Notes
Consider preparing your dough overnight for a fresher loaf in the morning. Store uneaten bread in a paper bag in the fridge.
Nutrition
- Serving Size: 1 slice
- Calories: 90
- Sugar: 0g
- Sodium: 400mg
- Fat: 0g
- Saturated Fat: 0g
- Unsaturated Fat: 0g
- Trans Fat: 0g
- Carbohydrates: 18g
- Fiber: 1g
- Protein: 3g
- Cholesterol: 0mg